Curriculum
Growing Your Business On YouTube
Set Up Your Channel
Despite being the second-most-visited website in the world, many businesses have ignored YouTube in favour of other social media sites such as Facebook and Instagram. Every day, YouTube users watch over a billion (yes, with a b) hours of YouTube videos, and yet only 9% of small businesses have taken the leap to start their own channel. As YouTube usage continues to soar, it becomes mission critical for businesses without a YouTube presence to jump in.
Get ahead of the competition and attract potential customers by making the most of this platform; in this course you will learn why YouTube should be a part of your marketing strategy. So lets start with setting up your profile.
If you have a Google account, you can watch, share and comment on YouTube content. However, Google accounts don’t automatically create YouTube channels. Getting a new channel set up is a simple and quick process, though.
1. Go to YouTube and sign in
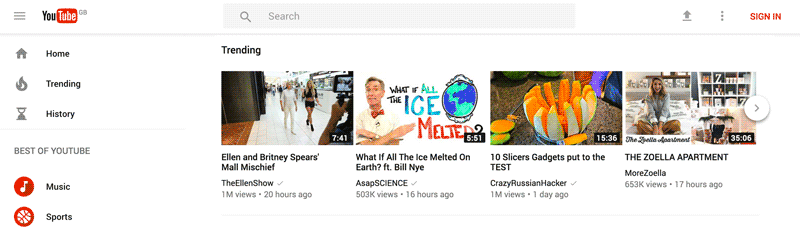
Head over to YouTube.com and click ‘sign in’ in the top right corner of the page:
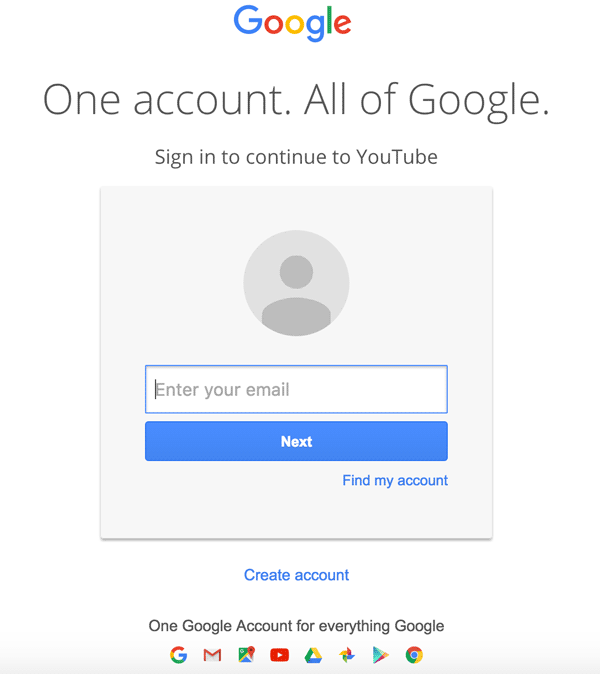
Then log in using the Google account you’d like your channel to be associated with … make sure it is the same email as your Google Business Profile email:
2. Head over to your YouTube settings
In the top right corner of the screen, click on your profile icon and then click “Create a channel.”
3. Create your channel
Next, you’ll have the option to create a personal channel, or a create a channel using your business name and Region. You have the option create a YouTube channel with your name or a custom name. As this is a business account you’ll use the same name as ALL your David Reid Homes Social Media Accounts.
Note: As you’ll see from the settings at this step, creating a new channel name will also create a new Google account with its own settings and YouTube history. This account nests within your main Google account and can be fully managed from the Google settings. It’s quite useful as you can use this new account to like and comment on other YouTube videos and participate in YouTube as your brand.
After this step, you’ll have the chance to further customise your channel. You’ll see options for:
- Uploading a profile picture
- Adding a description of your channel
- Adding links to your sites – this can include custom links to a website or blog as well as social links to Instagram or Twitter
Next, let’s fill out all the information and create some channel art to get your page looking awesome.
4. Create your channel art
Your YouTube channel art is essentially YouTube’s version of the Facebook cover photo. Channel art features in a prominent place on your YouTube channel, which means it’s absolutely vital for any YouTube channel to use customised art to share your more about your brand with your audience.
Again Canva has all the correct sizes so your don’t need to remember everything.
The perfect sizes for YouTube channel art
The best place to start with your channel art is with an optimal image size that works across multiple devices. For the best results, YouTube recommends uploading a single 2560 x 1440 pixel image.
- Minimum width: 1235 x 338 px. This is the “safe area”, where text and logos are guaranteed not to be cut off when displayed on different devices.
- Maximum width: 2560 X 423 px. This means that the “safe area” is always visible; the areas to each side of the channel art are visible depending on the viewer’s browser size.
- File size: 6MB or smaller recommended.
It’s interesting to note that YouTube is available on a ton of different devices – from as small as an iPhone to as large as a 60-inch TV. On TVs, the channel art appears in the background, behind the content on your YouTube channel. On desktop and mobile devices, it appears as a banner across the top. Test your channel art on different devices to make sure it doesn’t pixelate when large.
Tools and tips for creating YouTube channel art
In the past, YouTube has supplied a Channel Art Template to help you figure out the perfect layout for your channel art and how it’ll look across platforms. Here’s a preview of the template:
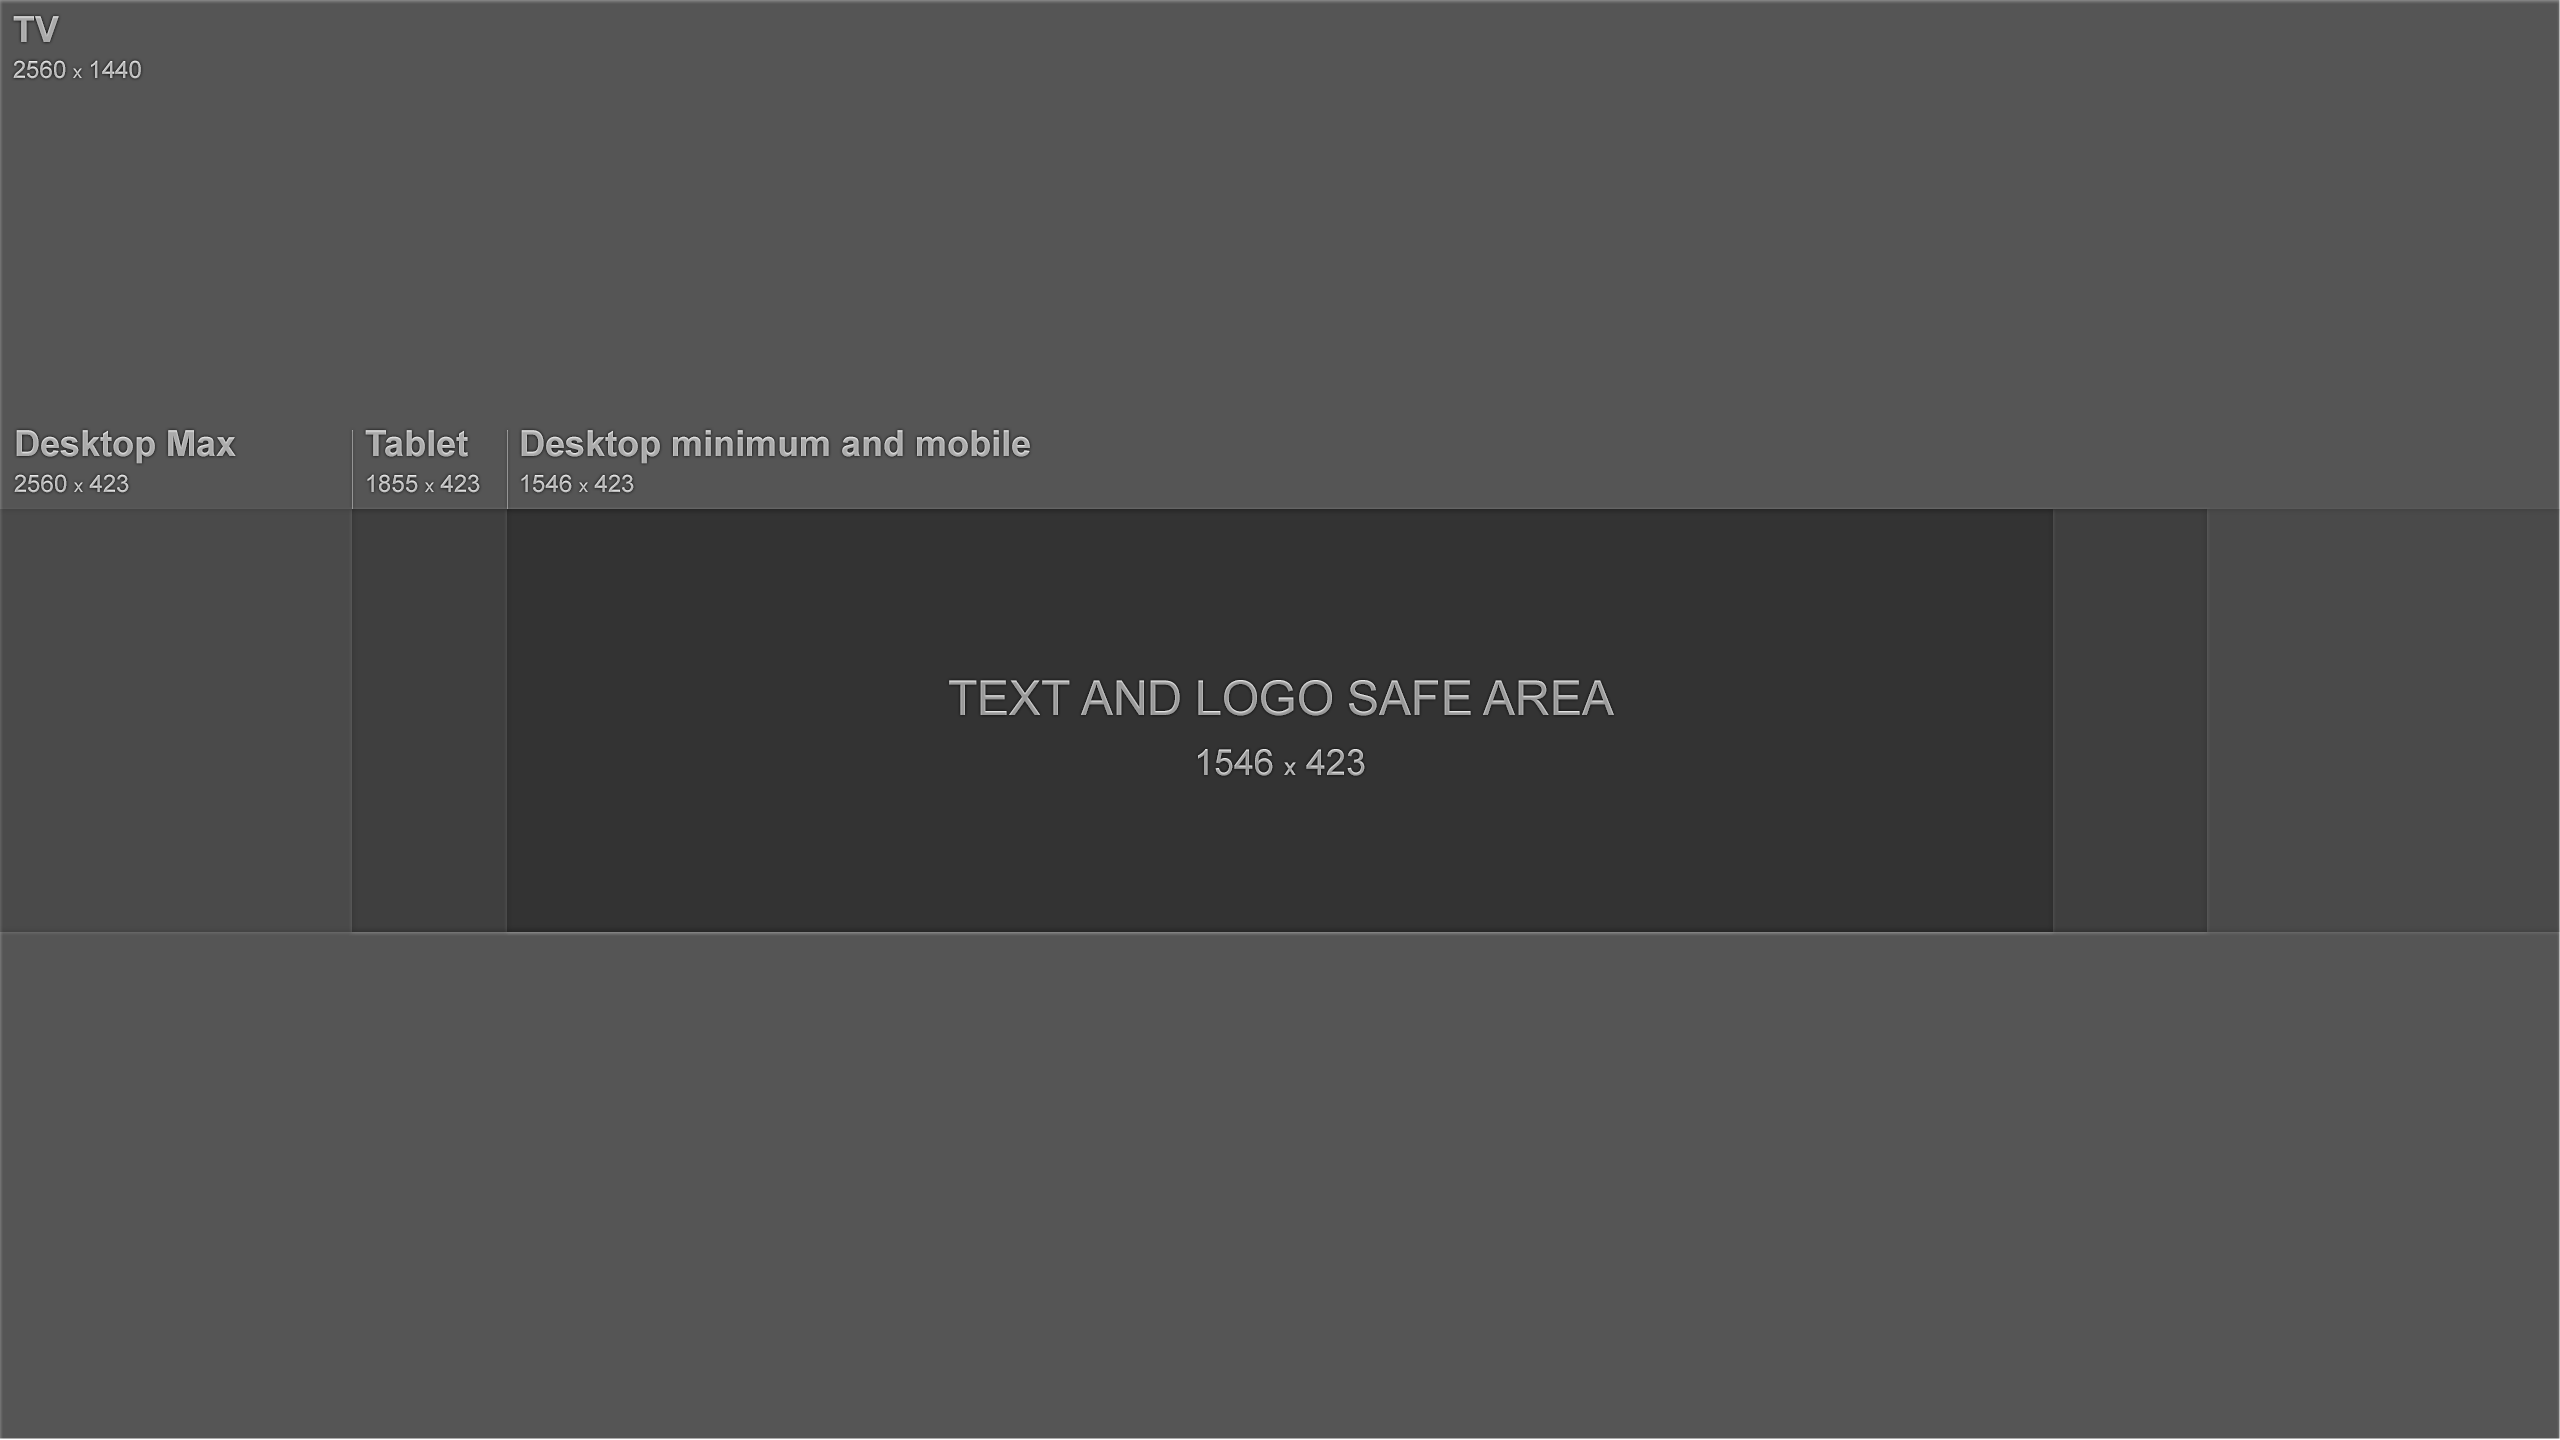
1. Ensure any text and logos are within the “safe” area: The text and logo safe area is the 1235 x 338 pixel space at the centre of the YouTube channel art template (see the template above). This is the area that will be displayed on YouTube when your channel is viewed on desktop screens.
Traditionally, the parts outside the safe area run the risk of being covered or illegible because of overlaid social links or profile pictures.
Be careful to ensure any important information such as branding, text, taglines, and key images are within the safe space so that they’re always displayed as part of your channel art across every device.
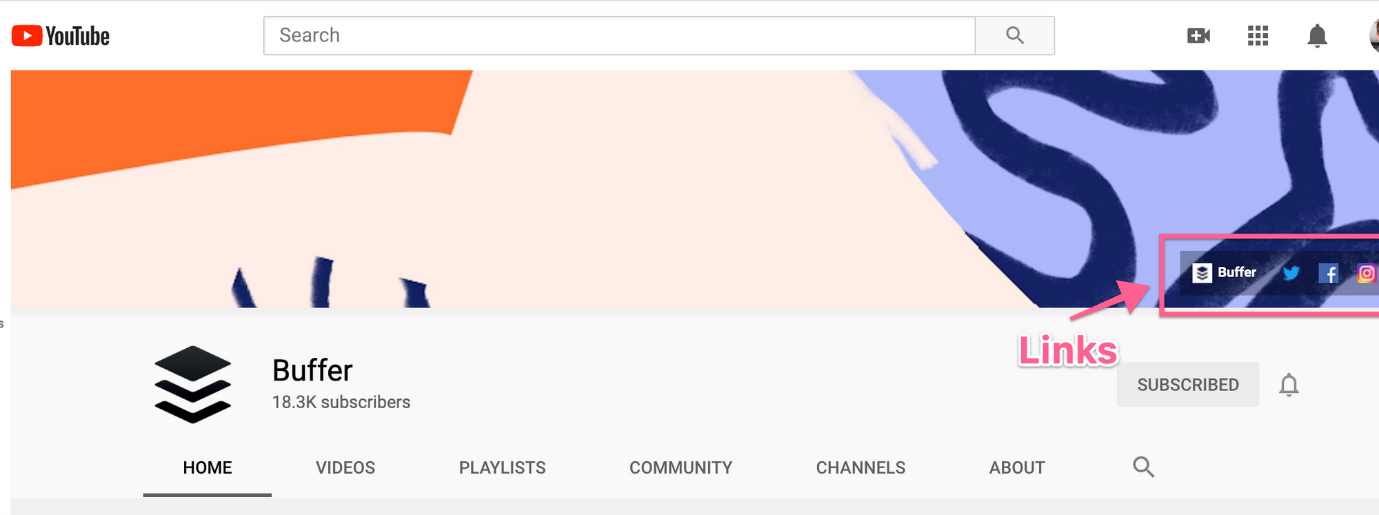
2. Consider your channel links: YouTube enables you to add links to your channel, and these are displayed in the bottom right corner, overlaid on top of your channel art. For example, check the bottom right of the channel art below:

When creating your channel art, it’s important to think about the space these links take up and ensure you don’t have anything important (such as logos) occupying that space within your design.
How to add art to your YouTube channel
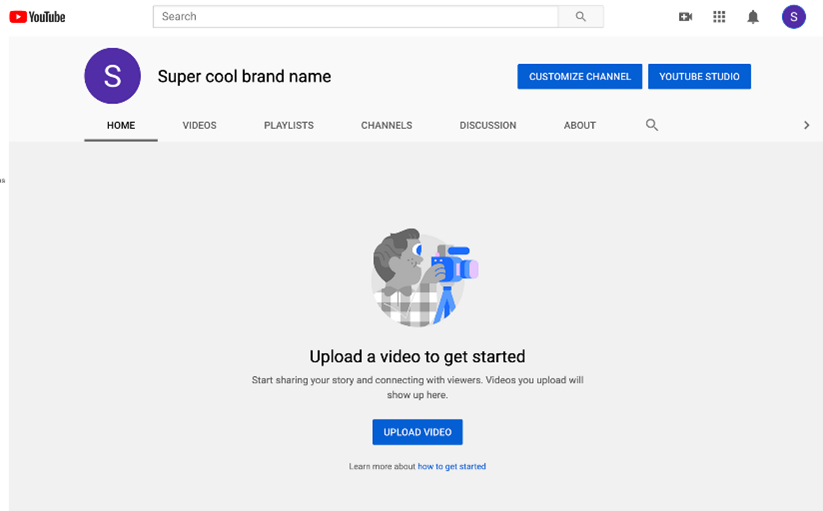
If you’re just setting up your YouTube channel, you’ll notice the channel art space (along with the rest of your channel). To add art to your YouTube channel as well as make any other customizations, click the Customize Channel button in the top right.
YouTube channel: Getting started from scratch? Click the Customize Channel button
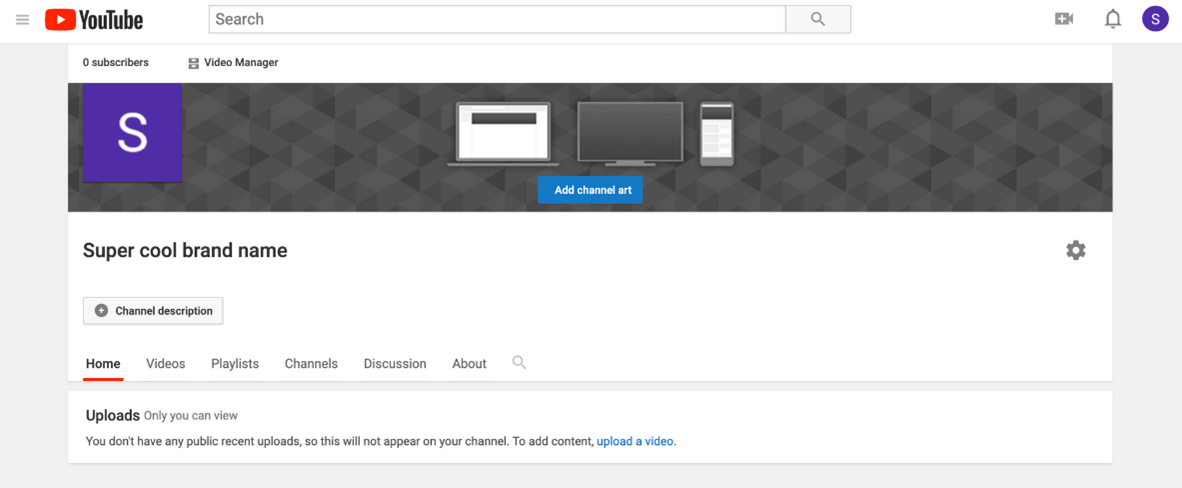
Once you’ve clicked this link, you’ll go to another editor screen where you can click on the different parts of your profile in order to make changes.
There should be a blue button in the centre to “Add channel art.”
After this, you’ll see a popup window that gives you the option to upload your own custom channel art. If you’d like to, you can also choose to use one of YouTube’s templates from the “Gallery” or choose to upload one of your photos from Google.
Once you’ve uploaded your channel art, YouTube will show you a preview of how it looks on TV, desktop, and mobile.
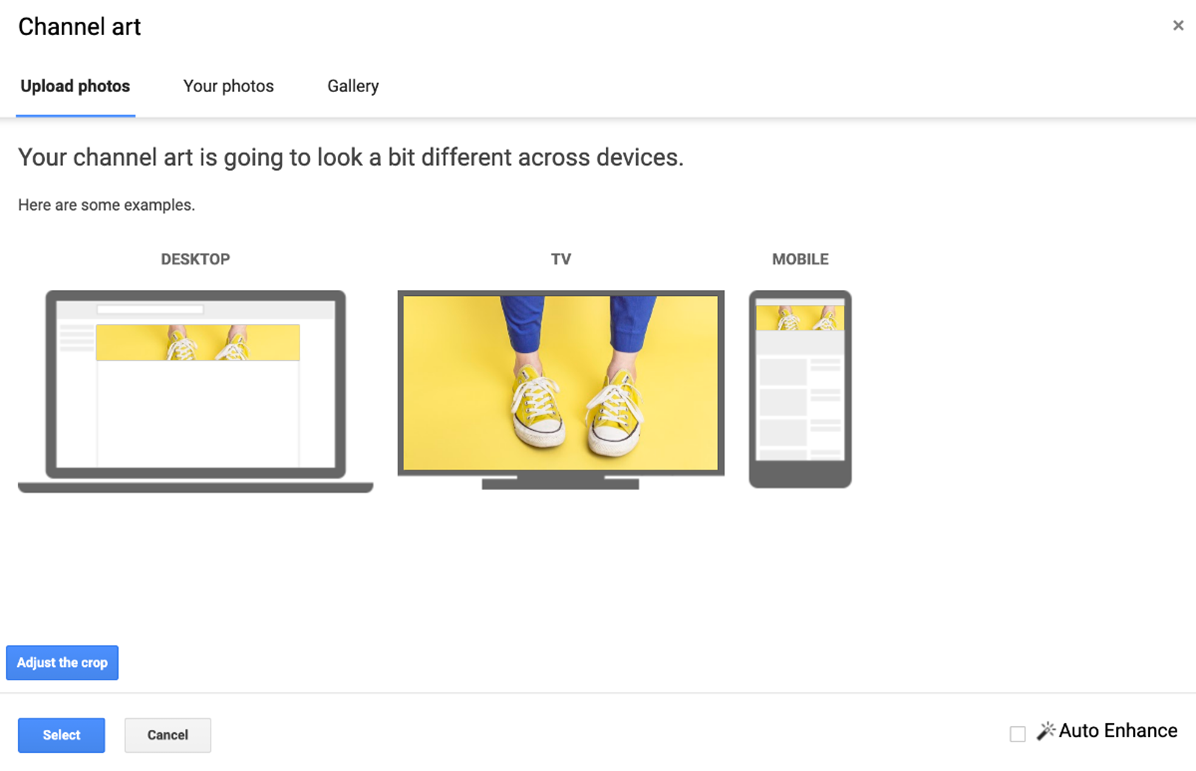
At this point, you may want to adjust the cropping of your image so that you can ensure it’s all lined up correctly. The cropping tool can be accessed by clicking on “Adjust the crop.”
This crop screen is very handy for checking how your design will look on various platforms. The clear section in the middle of the grid shows you the content that will be displayed on mobile and desktop and the rest of the image shows the image that will be displayed on TVs.
Once you’re happy with how your cover art looks, click “Select,” and your channel art will be added to your channel and saved.
How to add your channel icon (profile picture)
Each channel also has space for a profile icon/picture. This icon shows next to your videos and channel on all YouTube pages. The key here is to select something that will look good at very small resolutions – many brands opt to use their logo here.
Your channel icon should be 800 x 800 pixels and one of the following formats: JPG, GIF, BMP, or PNG file (no animated GIFs).
To update your channel icon, head to your channel homepage and hover over your current channel icon until you see the edit icon appear. Click on that icon, and you can upload a new profile icon.
5 More Steps to Enhance Your YouTube channel
1. Optimise your description
YouTube gives you a space on your channel to write a little about your brand and the content you share on YouTube. The description is limited to 1,000 characters, so you have a little room to be creative here.
The copy in your channel description won’t just appear on your channel page. It’s indexed by search engines and can also be featured across YouTube in suggested channel categories and search results. A good tactic is to include some relevant keywords and CTAs within the opening lines of your description. Go back to your Google Business Profile and copy from there.
And be especially mindful of the first 100-150 characters. Depending on where the description appears, the remaining text could be truncated.
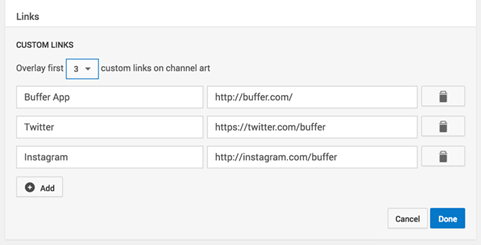
2. Add links to your channel
You can have up to five links appear in your channel’s banner. The first link will appear expanded and the remaining links will show up as icons.
1. Click the “Customize Channel” button on your channel’s homepage.
2. Then click on the gear icon in the upper-right corner, just beneath your cover art.
3. You’ll see a Channel Settings lightbox appear. Here you need to toggle on the option labelled “Customize the layout of your channel”: Toggle on the option to “Customize the layout of your channel.”
4. Now that you’ve enabled customisations on your channel, pop back to your channel homepage and you’ll now see the option to “Edit Links” under the settings menu on your cover art.
5. Click the “Edit Links” option and you’ll then be taken to the “About” section of your channel. Here you’ll have the option to add links and choose how many are displayed over your cover art:
3. Add a channel trailer
As soon as visitors land on your channel, you want to give them a picture of the type of content your channel covers and why they’ll want to subscribe and check out your videos. A channel trailer is the perfect way to do this. A short, to-the-point channel trailer can be a great way to introduce people to your content. A channel trailer should grab attention as soon as it starts and also represent the type of content you create on YouTube.
It’s also important to think about the description you add to this video, as it features prominently on your channel homepage.
(These trailers only appear for people who are not yet subscribed to your channel.)
Here is a look at where this trailer appears on your channel homepage. Note how the video is on the left, and the title and description appear to the right? That’s a lot of prime real estate!
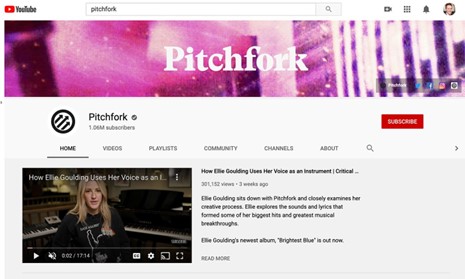
The channel trailer takes a prime position on the YouTube channel page.
4. Add your contact details (email address)
As you are using YouTube as a business have your contact details on hand for potential customers to contact you. YouTube has a section on each channel profile for you to list your contact details for business inquiries.
This can be found under the “About” section of your channel. To find it, go to your channel homepage, click “About” from the navigation, and then scroll down to “Details.” Here you’ll see the option to share your email address
Next Lesson: Reposting YouTube Shorts