Curriculum
Content Posting
Fail to Plan – Plan To Fail
0/3Scheduling Tools
0/4Content Engagement
0/3Insights & Analytics
0/1Using Canva
One thing I hope that has become clear from this training is that marketing and Social Media marketing is something that once planned properly fits into your business in the same way as doing your books or managing your stock. You have a system and a process and move on with growing your business and keeping your customers happy.
That is why having the ability to schedule posts is a lifesaver. Content schedulers allow you to schedule content for days, weeks, and even months in advance without having to worry about making new posts daily especially IF you are using the Content planner from the Content Creation training.
Many social platforms let you schedule posts in advance, but you need to have your image ready before you schedule it. Fortunately, Canva has a scheduling feature that enables you to schedule content without having to leave the Canva workspace.
Let’s take a look at how you can use the Canva Content Planner to create and schedule content to your social media accounts.
Getting Started With the Canva Content Planner
It’s important to note that the Canva Content Planner is only available if you’re subscribed to Canva Pro at $18 per month (there are annual options). You can also take advantage of the free 30-day trial period to test how well this feature works. And although you may see the Content Planner when using Canva for free, it won’t be accessible unless you have a subscription.
How to Schedule Social Media Posts in Canva
With Canva, you can schedule posts on Facebook pages, Instagram Business accounts, Twitter, LinkedIn and Pinterest. It offers two ways to schedule content for social media platforms.
1. Using the Canva Editor
It’s easier to schedule content with the Canva editor since you can design and schedule your post from the same window. Just make sure the social media account you want to post to is connected to Canva.
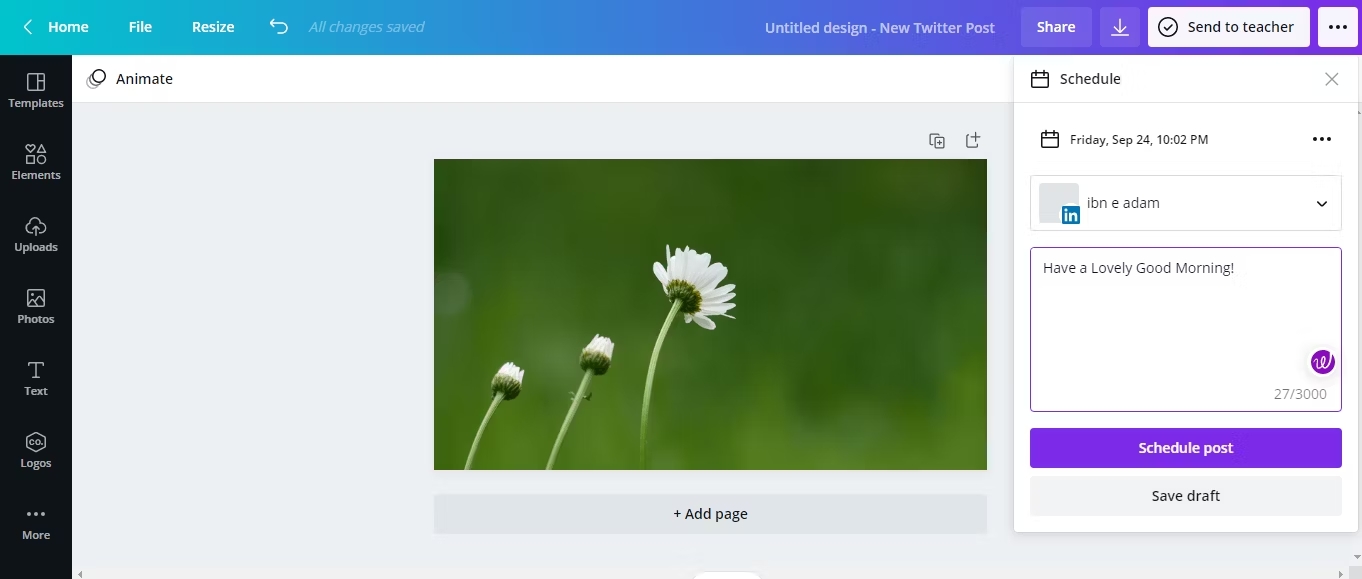
Here’s how you can schedule content within the Canva Editor:
- Log in using your credentials on Canva.
- Create the design you want to post.
- Click the three horizontal dots in the upper right corner when you’re finished.
- Select Schedule from the list of available options in the menu.
- Choose the time and date you want to schedule the post for, and tap Next.
- Select the social platform where you intend to schedule the post. If you haven’t already integrated your social media accounts, Canva will ask you to do so first.
- Write a caption for your post, and tap on Schedule Post.
- You can also save a draft of the scheduled post before finalizing the caption.
2. Using Canva’s Content Planner
You can also schedule posts using Canva’s Content Planner. With this method, you simply use a calendar view to schedule content.
- Head to Canva’s homepage.
- Navigate to the Content Planner from the menu on the left side of the screen.
- Select a date from the calendar, and hit the plus (+) sign that appears inside the box.
- Select the content you want to schedule.
- Tap on Schedule at the top of the screen.
- After that, choose the platform you want to post to, add a caption, and hit Schedule Post.
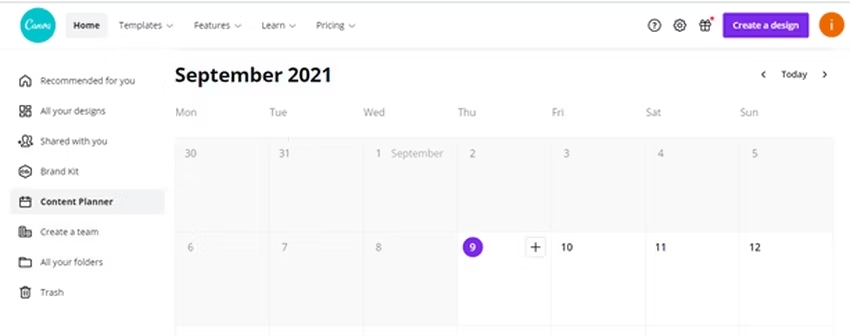
The main difference when scheduling content with this method is that you can check which days you already have content scheduled. Choosing a scheduled date and time is easier this way, especially if you tend to randomly select the time when scheduling posts.
How to Edit a Scheduled Post in Canva
Let’s say you’ve scheduled a post that needs further editing before going live. Canva lets you re-edit it, however, it pauses the previously scheduled post. This means that you will have to reschedule it in the same way as described above. As a result, it won’t go live even if the scheduled time passes while editing the post.
- Here is how you can edit the scheduled post using Canva’s Content Planner:
- Navigate to the Content Planner in Canva, and select the scheduled post that you want to edit.
- Tap on the three horizontal dots located next to the time and date for the scheduled post.
- Tap on the Edit design option in the dropdown menu.
- Make the changes and reschedule the content for the time and date you want.
- When you schedule a post on one social media profile, you can schedule it on social platforms simultaneously by selecting your other accounts.
Canva also shows the list of paused posts in the Content Planner. You can check this later if you forget to reschedule the post after making the edits.
The Downside of Using Canva as A Scheduling Tool
- There is a limit to the number of posts you can schedule at once (25 posts at a time).
- The Content Planner on Canva’s desktop site doesn’t support scheduling Instagram Stories and Reels. However, you can do this on the mobile app.
- There is a limit to the number of hashtags you can add to Instagram posts when scheduling content via the Content Planner.
- You can’t schedule carousel posts on Instagram.
Next Lesson: Using Buffer As Your Scheduling Tool