Curriculum
Content Posting
Fail to Plan – Plan To Fail
0/3Scheduling Tools
0/4Content Engagement
0/3Insights & Analytics
0/1Handling Negativity
In the previous training we covered creating dealing with Comments and in turn inviting people to like your page or follow you. In this training we are be covering dealing with negativity.
Posts and Videos
Comments made on posts are viewable by the public. These need to be moderated and replied to promptly, especially if they contain negative content that may impact others’ impressions of your business.
To respond to comments on a specific post, navigate to the post (via desktop or mobile app) and scroll down to the comment section. Click Reply on the comment you want to respond to. Type your thoughts and click Send.
What to Say in Your Response
It’s important to consider how your comment will appear to others. Remember — your reply might also be public to others!
Responding to positive comments is easy — just match the customer’s level of excitement. Neutral comments are easy, too. Toss in an emoji or two to make it more colourful.
Negative feedback is tougher to navigate. If the complaint is genuine, you want to come across as sincere and thoughtful in your response. Here are some tips for offering a palatable reply:
- Start with an apology, even if the situation was beyond your company’s control.
- Include some form of resolution, such as a discount and an invitation to give you another try.
- Share steps you’re taking to make sure situations like these don’t happen again (if applicable).
- Don’t engage when you’re angry. Wait for a clear head and let your logic do the talking, not your feelings. Take a step back, breathe deep, and answer when you’ve had time to thoroughly think through what you want to say.
- Don’t argue with the customer. Now is not the time or place to talk about who is right or wrong. Your job is simply to acknowledge them and make them feel heard.
Hide Negative Comments
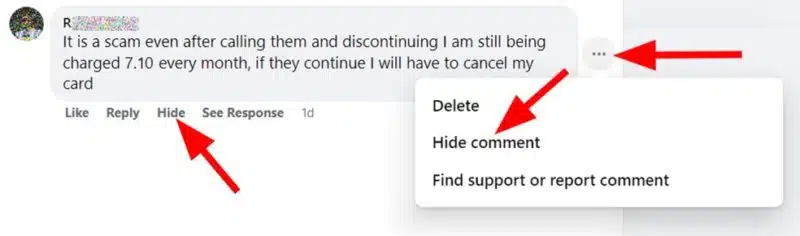
Facebook offers one of the best set of social media management tools out there. If you do not want a comment to appear on one of your posts where all can see it, you can click to hide it from view. The Hide control link appears below the post or on the right side if you hover over it, enabling a few different management options that include “Hide”. The brilliant part of this option is that the negative comment will still appear to be visible when the person who posted it views the comments, and also their friends will still be able to see it.
You can also reply to their comment, as per my first tip above, so when you hide their comment, replies to that comment are automatically hidden from everyone else on your Page as well! This can diffuse the anger of the commenter some, as they feel they have accomplished their goal of broadcasting a statement. Short of replying and managing the comment in the public space, this is the best option available. If you are short on time, or your Page receives far too many comments on a daily basis for you to deal with, you can switch off commenting on that post.
How to Hide Spammy Comments
Spammy comments on Instagram are inevitable, no matter how great your content is. Although you can simply ignore them, it’s important to remember that this kind of engagement can affect customers’ perception of your brand, especially if it includes offensive content. Spammy comments can take away from the value that the positive reviews and thoughtful responses provide.
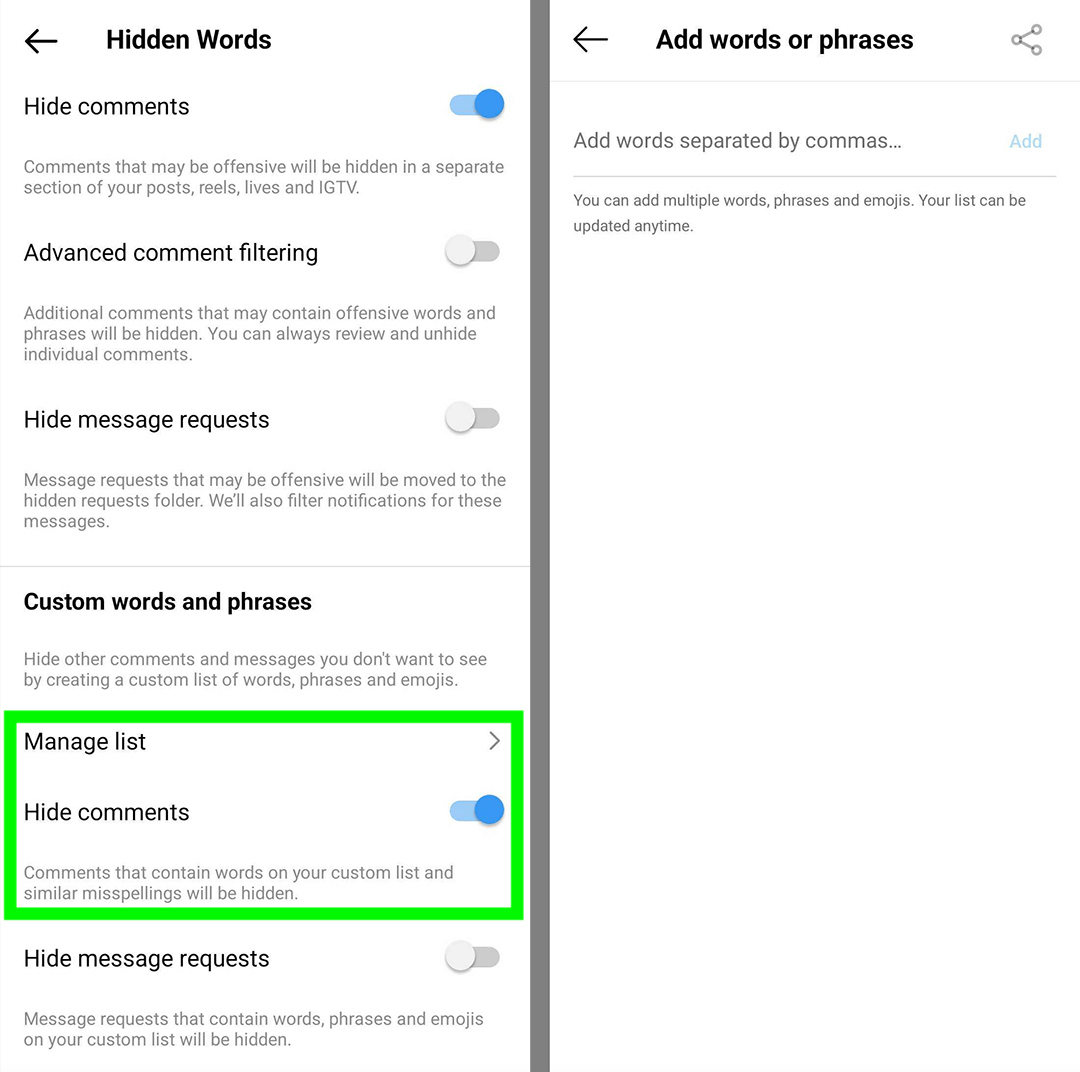
If you don’t have time to moderate and remove spammy comments manually, don’t worry. You can automate much of the moderation process. First, make note of some of the most common words and emojis that appear in these comments. Then add the terms and emojis to your Hidden Words list in Instagram and Facebook so the channel can automatically hide them from view.
- In the Instagram app, tap to open Settings.
- Go to Privacy and select Hidden Words.
- In the Custom Words and Phrases section, switch on Hide Comments.
Then tap Manage List and enter all of the words, phrases, and emojis from your spammy comments list. You can add as many as you like and change the list at any time. With spammy comments out of sight, you can focus on maximizing meaningful engagement from your audience.
Block the negative commentator from your Page
Does your Page have a constant heckler? This happens at times. If so, you can use the Facebook Page settings to ban them from the Page so they will no longer be able to post comments.
- Under the Page’s settings, find the link for “People and other Pages”,
- Click on it, and then search for the user under “People who Like this Page” or “People who follow this Page.”
- Once you have located them, click the box next to their avatar icon to select them,
- Click the gear icon button in the upper right of the Page and select “Ban from Page” in the small popup menu.
- If the heckler is not listed among those who like or follow the Page, click on the box titled “People who Like this Page” that is just above the table listing people who like the Page.
- Then, select “Ban a person.” Type in the person’s name, select the right person and click to save.
You can also use the opportunity to then ban the person from your page and report the person to Facebook and get them out of the picture. This is perfectly acceptable, and it is actually a sign that a brand is looking at it’s content, and thinking about the fanbase.
Next Lesson: Sharing and Tagging